Displaying a Bust Image
A growing trend of modern Visual Novels nowadays is including a bust of the characters near the message box. There are many reasons why the developer might want to do this, some examples are:
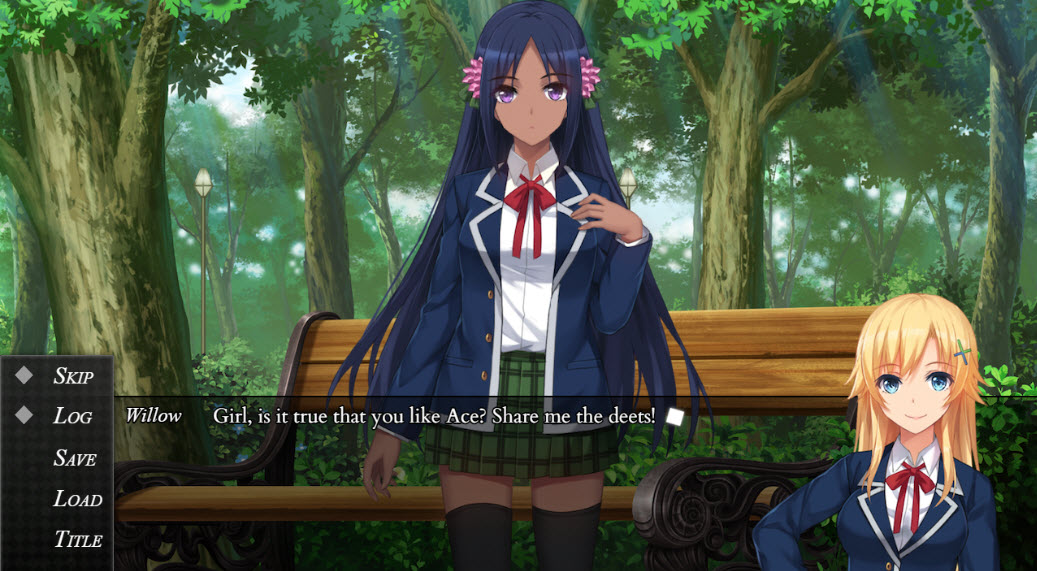
Since we're using the default UI, here is how it will look like in-game.
Preparing the Predefined Object Position
Make sure to read Understanding Predefined Object Position first! This tutorial will only skim over the details.
return { x: Graphics.width - object.dstRect.width * object.zoom.x, y: Graphics.height - object.dstRect.height * object.zoom.y }
return { x: Graphics.width - object.dstRect.width * object.zoom.x, y: Graphics.height - (object.dstRect.height/3 * object.zoom.y) }
However, there is one problem, as you can see, she's below the message box.
One way we could avert this is to adjust the Z-Order of the character in Join Scene to 9999. But this isn't efficient because every time this character appears, we would need to adjust their z-order. Instead I added another line of code, just before return.
object.zIndex = 9999; return { x: Graphics.width - object.dstRect.width * object.zoom.x, y: Graphics.height - (object.dstRect.height/3 * object.zoom.y) }
What this line of code does is change the object's Z-Index. Since it's before return, it won't be applied on the coordinate fields of the Join Character command. This saves tremendous amounts of time from repetitive work.
Make sure to save your progress!
Preparing Text Macro
Next, we will create a Text Macro to clear the character expression. This is for scenes that the character isn't talking.
Make sure to read the Text Macro and Text Codes to have an idea of what we're trying to do!
{W:A}{WE:N}{E:1}
It means, unless the player clicks, it will not erase the expression. Otherwise, the character's expression will be erased the moment the message is fully displayed!
In order to use this macro, we will have to use {M:clr}
Adjusting the Message Window
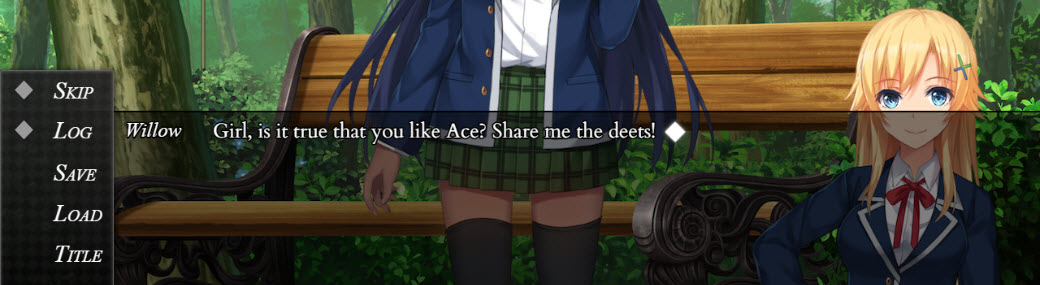
Now let's move to Scenes and setup our character. Because of the character's position, we have to change the width of the message box whenever they are displayed. Otherwise, this is how it will look like:

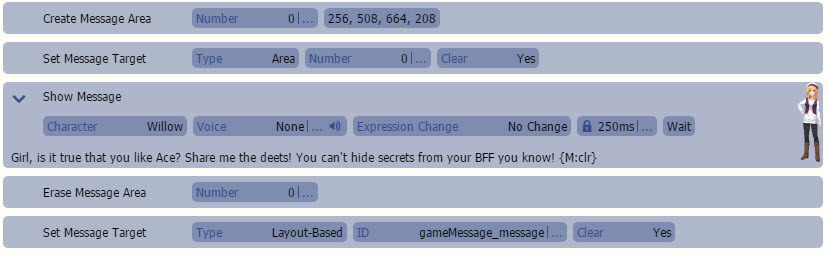
This is where Create Message Area and Set Message Target are useful.


As you might have noticed, it would be inefficient to keep doing this whenever we want our protagonist to talk. Which leads us to...
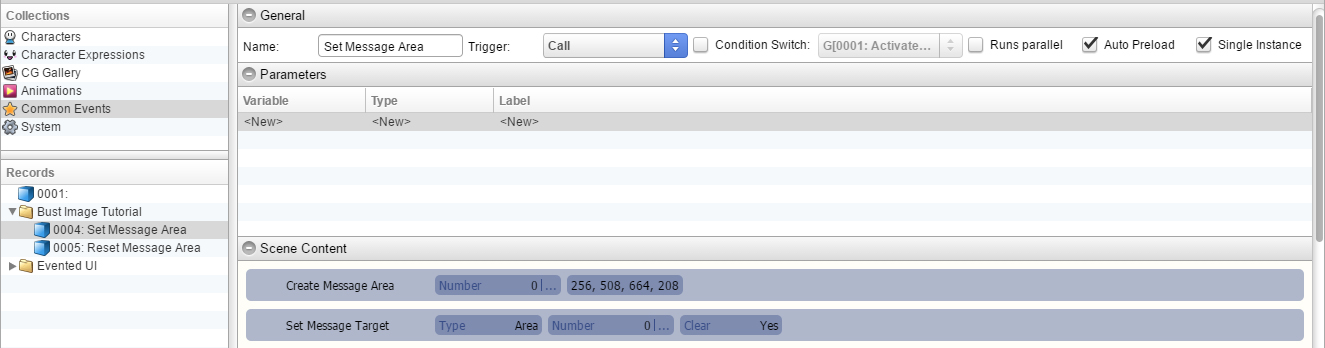
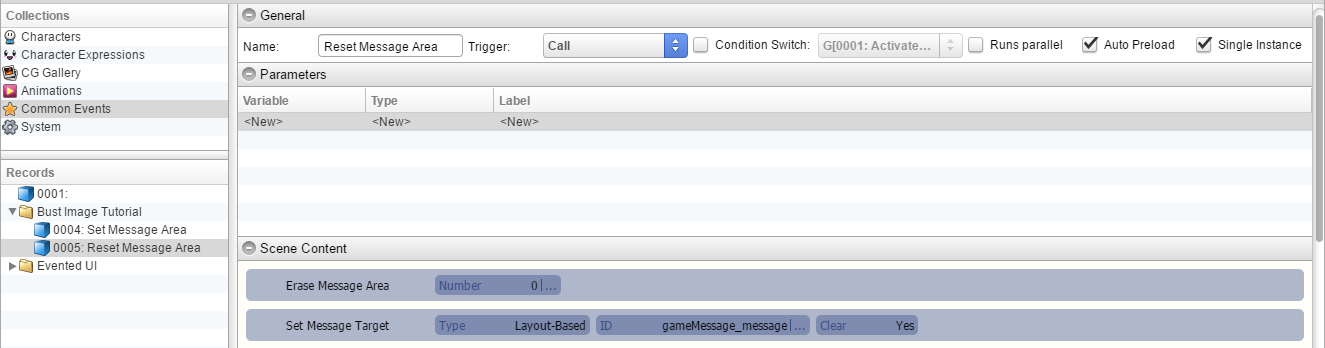
Common Event Setup
If you are unsure what a Common Event is, make sure to read the tutorial!

Your ![]() Common Events would look something like these:
Common Events would look something like these:
Scene Content Setup
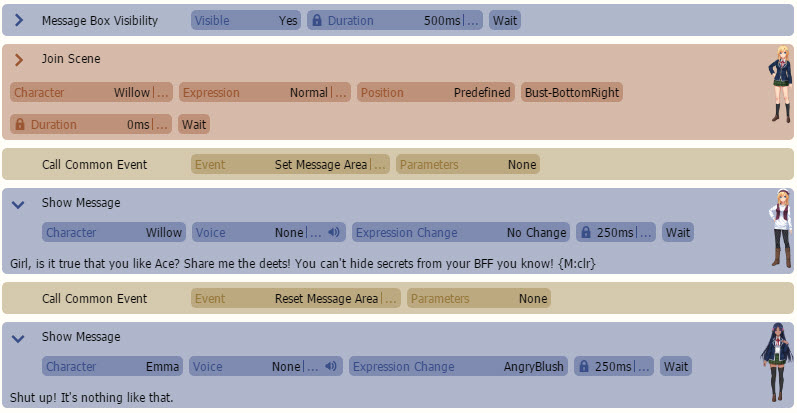
Phew, we're almost there! Let's go back to Scenes and set up the commands.
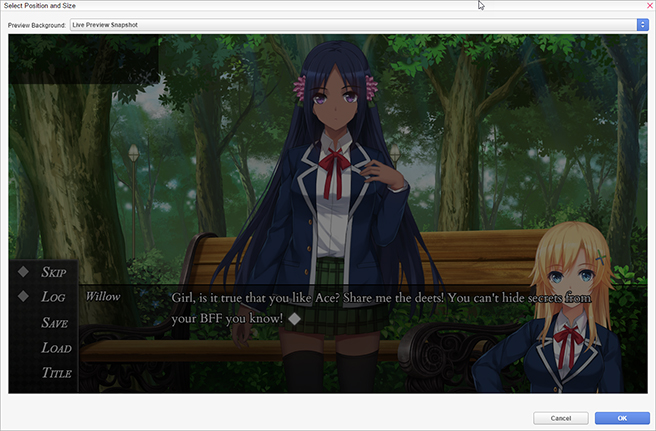
If done correctly, our final scene should look like this:
 .
.
Now instead of having four commands, we reduced it to two! Now you can use this everywhere you want!