Scene Editor
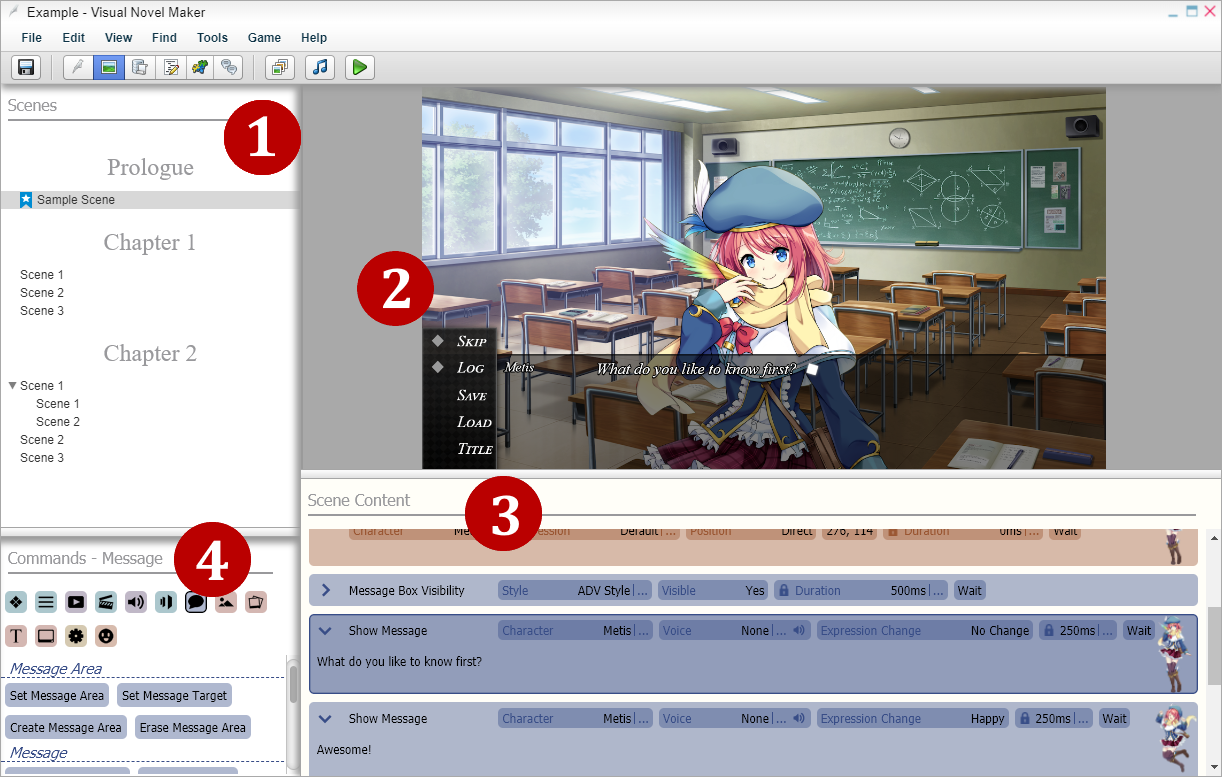
In Scene Editor, you can easily put your scene together by dragging commands into the Scene Content or just with your keyboard. The top area contains the Live Preview which gives a accurate preview of your current scene.

1 - Scenes
You can organize your Visual Novel with chapters and scenes.
Chapter - Can contain scenes. This is useful to organize your scenes by chapters.
Scene - A single scene of the game. A scene can contain sub-scenes for better organization.
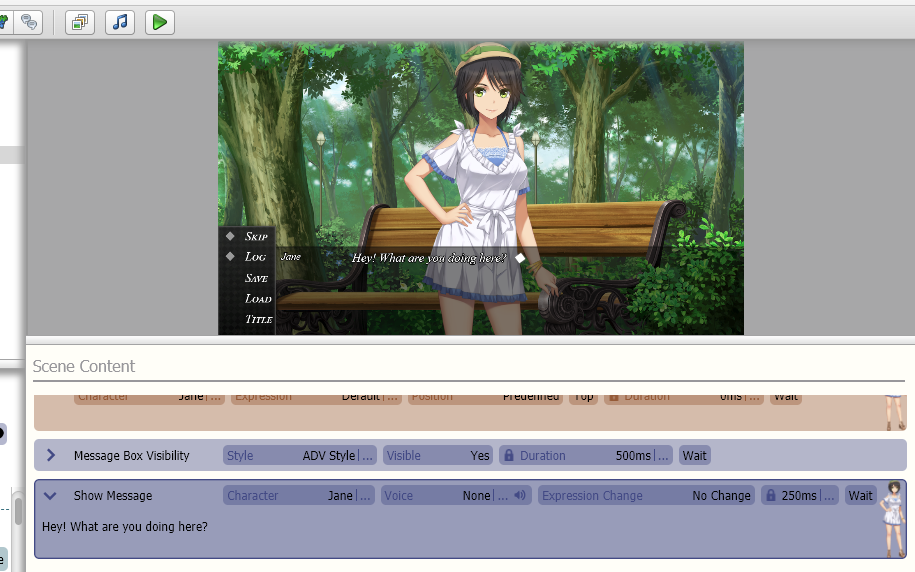
By default, the top area of the Scene Content contains the Live Preview. The Live Preview shows you how your current scene looks like at the selected command. It does that by skipping through your scene until it reaches the selected command. That means that certain commands such as Wait or Wait for Input are ignored in Live Preview since it skips everything. Also, for better stability, commands such as Change Scene have no effect in Live Preview and all Audio commands are muted by default.
In Application Preferences you can configure Live Preview to your needs or deactivated if you don't need it. You can also turn off Live Preview for certain scenes only if you open Scene Properties from the scene's Context Menu. Check The Menu Bar to learn how you can detach Live Preview and put it on a second monitor to get more space for commands.
You can also make a mouse click into the Live Preview which will then play your scene from the selected command normally including timing, waits, etc.
3 - Scene Content
The contents of the Scene. You can read more information about the individual commands in the Scene Content Commands page.
4 - Commands
All commands sorted by category. You can easily drag & drop a command into the scene or use your keyboard. See below for more information.
For some commands, you need to select a record/element from the database like a character or character expression.
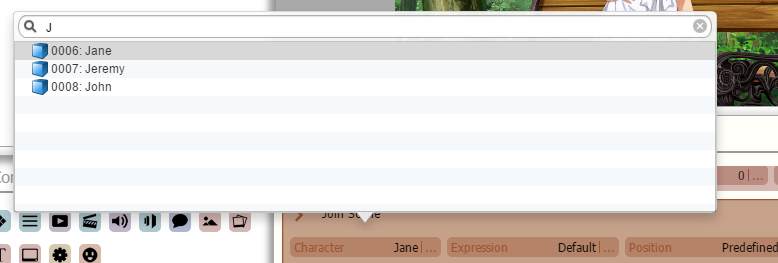
You can use the search-box at the top to filter the database records so you can easily find and select the record you want.
Press
the Tab( ) key to jump from the search-box to
the record-selection box and vice-versa.
In
search-box: Press the Escape( ) key
to erase the search-box content. Press it again to cancel the selection.
In
record-selection-box: Press the Enter/Return( )
key to accept the selection.
In
record-selection-box: Press the Escape( ) key to
cancel the selection.
Graphical Editor & Preview
For some commands such as Join Character or Show Picture, a graphical editor can be used to make the positioning more easy.
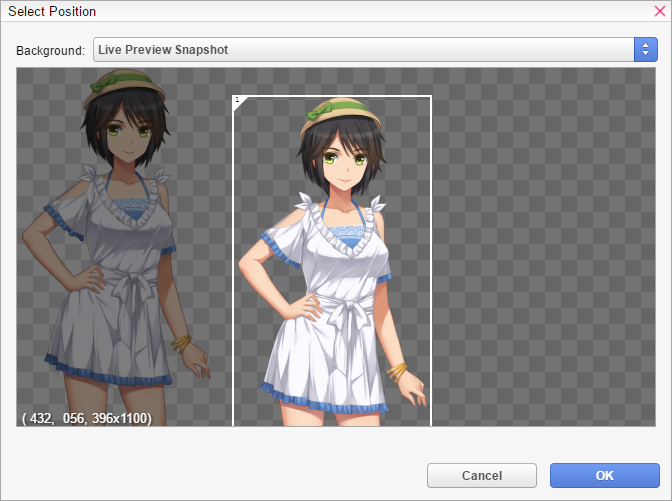
If the graphical editor window is too big for your screen resolution, just open Application Preferences and uncheck the Original Size Preview checkbox.
Groups
For some game-object related commands such as Show Picture, you can specify a group to distinguish between your own game objects and game objects created and managed by extensions. You can just click on "@default" to switch to another group.

You can learn more about groups and how to share content via extensions under Sharing Content.
Use your Keyboard
You can also just use your keyboard and start typing the name of the command you want to add and an auto-complete box will automatically appear.

Press Enter/Return
( ) key to add the matched command
to the scene. The command is inserted after
the selected command.
Press Enter/Return
( +
+ ) key to add the matched command to the scene.
The command is inserted before
the selected command.
Press Escape
( ) key to cancel the auto-complete box.
Important Notes & Shortcuts
The
lock ( )
icon indicates that a command will not change such fields or uses
the default values instead. The actual behavior depends on the implementation
of the command. Default Values can be changed using the corresponding
commands like Audio Defaults command, Character Defaults command,
etc.
If
you change the values manually, the icon shows an unlocked ( ) icon as a visual indication.
Commands that have Direct/Calculated position settings always using Top Left coordinates for positioning regardless of their anchor point. The anchor-point is only used for zooming, rotation, etc. but not for positioning.
You
can press Ctrl+Delete ( +
+ ) to
delete the selected command or scene. On Mac, you have to press Fn+Backspace.
You
can press the Right Arrow ( )
key to put a command under a Condition or disable it when it's not
under a command that requires tabbed commands. For Example: If a Condition
command is true it only executes
the tabbed commands under it. Otherwise it skips the tabbed commands
under it.
If
a command is Indented, you can press Left Arrow( )
key to move their position back to the left.
You
can press Up Arrow ( )
key to select the previous command. Hold Shift (
 )
key to extend current selection.
You
can press Down Arrow ( )
key to select the next command. Hold Shift (
 )
key to extend current selection.
You
can press the Tab ( ) key to move to the next field.
Press Space (
 )
key to edit the field.
You
can press Shift+Tab ( +
+ ) to
move to the previous field. Press Space (
 )
key to edit the field.
You
can press Shift+Space on a selected field to press the variable-button
( +
+ ) instead of directly editing
the field.